

 17778
17778
Utah Tech uses GlobalProtect VPN to provide secure access to University network resources both on and off-campus.
- Current employees may use the client on both University-owned and personal devices. Some features and access to certain resources will not be available unless you are using a University-owned device.
- Students are also eligible to use the GlobalProtect client. Any student can use the VPN for a secure connection back to the general Campus network and Internet. More specific access is granted on case-by-case basis, typically as needed for for a class or lab. Your instructors will have more information for those who need access or you can contact the Help Desk if you believe you have an access need.
- Vendors, contractors, or others using a sponsored account for VPN access to the UT internal network will need to coordinate with their campus contact person and/or IT Services.
If you are using an Android, ChromeOS, or IOS device, download the GlobalProtect Client from the Google Play or Apple store, then proceed to step 6.
University-managed computers will almost always be issued with GlobalProtect already installed. If your computer is university-managed or you know you already have the GlobalProtect client installed on your Windows PC or Mac, proceed to step 6.
Windows and Mac instructions are below:
Step 1
Go to https://vpn.utahtech.edu and sign-in using your Digital ID and password

Step 2
Multi-Factor Authentication( MFA) is required to use the VPN.

Step 3**
Select a download link:
Window Users: Click on Download Windows 64bit GlobalProtect Agent.
Mac Users: Click on Download Mac 32/64 bit GlobalProtect Agent.

Step 4
Run the download installer file.

Step 5
Follow the installer's instructions. If an administrator login prompt appears during installation, please contact the IT Technicians at ext. 8324 for assistance. You may also submit a ticket for further assistance.
When the installer is finished, the installation phase is complete. You do not need to repeat any of the previous steps.

Step 6
You should now find GlobalProtect in your list of installed programs in the Windows Start Menu, Finder in Mac OS, or App Drawer in mobile OSes. If desired you can pin the GlobalProtect program to the taskbar or app dock.

Step 7
Enter vpn.utahtech.edu as the portal address and click on the connect button.

Step 8
Sign in using your Digital Id (or sponsored account) and password and accept the Authenticator Push (See step 2 regarding MFA methods). Please note that MFA is REQUIRED for the GlobalProtect VPN.

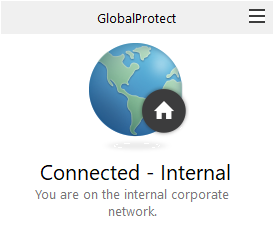
Step 9
You are now connected.
Step 10
As long as you're connected you will see this icon in the bottom right of your screen.

Step 11
To disconnect from the VPN click on the three bars in the upper right-hand corner and click on Disable. You're now Disconnected.

**Notice**
If you are a Student, Staff, or Faculty, make sure you have Two-Factor Authentication (Microsoft Authenticator). If you are still facing problems, please submit a ticket.
If you have a Sponsored Account, please submit a ticket to have your account approved.

