

 24414
24414
Using Autocrat to Generate Personalized PDFs with Google Sheets
PREREQUISITES:
- Must have Autocrat installed on your Digital-ID's google account
- Google Sheet/Excel Sheet Containing information you want to put into PDF
- Google Doc/ Word Doc that will be the Template for the PDF with tags for Autocrat
Autocrat also has their own test documents but they can be rather confusing so I will be using my basic documents for these instructions.
Step 1 - Google Drive Prep
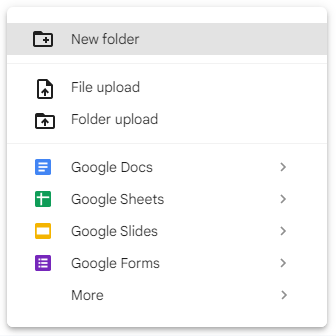
Create a New Folder in your Google Drive and name it whatever you wish.

Place your Sheet and Template that will be used for Autocrat inside the folder.

Create a new folder in the recently made folder to contain the PDFs that are generated

Step 2 - Create a new Autocrat Job
Start by opening your Sheet

Open Autocrat

Select "NEW JOB"

Enter a Job name and click "Next"

Now you will choose your Template file, Mine is "Job promotion letter"
Click "From drive" and select the correct file

It will then add your file into Autocrat, click Next

The Merge tab drop down will be what ever Sheet tab you have your data. Mine is on the default Sheet1
The Header row and First data row will most likely stay 1 and 2 but if you have your data elsewhere in the sheet you will need to change them accordingly

Now you will need to give Autocrat the Column headers from your Sheet so it knows what data to put in the template
Autocrat will do its best to guess what columns map to what tags but double check to ensure they are correct.
Once finished, you can click "Next"

It will now ask for what you would like the output file to be named
You can use <<Tags>> from the last step to generate custom names for the file
I would recommend <<First Name>> <<Last Name>> just to help with differentiating between files
Another option you have is the Type which can be changed to PDF or Google Doc
I recommend PDF as it can be used everywhere

Next it will ask for a Destination Folder
This is where all of or files will be stored after they are generated
I recommend saving it in the file we create earlier
Click "Choose folder"

Navigate to the folder you would like your files to go, mine is PDFs
Make sure the folder is blue like mine and scroll down and click "Select"

Your destination folder page will come back and look something like this

You will want to remove any extra folders that are not your PDFs folder
You can do that by hovering over the wrong folder and clicking the ![]()

Once you have the correct folder, you can click "Next"

Next is Dynamic Folders, for this process you will not need these folders, you can click "Next"

Next is Merge Conditions
This will check a specified column for data and if it applies, the merge will happen with that row
This image shows the example that as long as the First Name is not blank, the row will be merged into the template
This step can be skipped if every row needs to be processed. Click "Next"

For the next two steps, Share docs & send emails and Add/remove job triggers can left as is
Click "Next" until the button goes away. Once the "Next" button is gone, Click "SAVE"

Step 3 - Run the Job
This will take you back to your Jobs page
This is where you can Run, Edit, Preview, and Delete your job respectively.

If everything is ready to create PDFs, You can hit the ![]() button to start the creation
button to start the creation

Step 4 - Find your PDFs
Once the job is done, your Sheet file will look like this
It will add on a few extra columns that will show data about the job
This will show errors if any occur

You can now check your PDFs folder for your PDFs

You should now be set to use these PDFs as wanted!
There is another article that uses these PDFs and sends them in a mail merge:

